In this article you'll lean how to,
- Installation of Imagick for XAMPP v3.2.2 in Windows 10
- Download Imagick for PHP
- Download required Imagick binaries
- Resize image using
Imagick::adaptiveResizeImage()function - Use Imagick command-line utilities to generate heatmap/thermal effect
Imagick is a native php extension to create and modify images using the ImageMagick API. The name causes some confusion as people think that ImageMagick and Imagick are the same thing, however they aren't
- ImageMagick is a PHP utility, a command line tool for image manipulation.
- Imagick is an API or a class that performs the function same as ImageMagick. It provides numerous functions for image manipulation in PHP.
You can check with PHP code whether the Imagick is installed or not,
<?php
if (extension_loaded('imagick')) {
    echo 'imagick installed';
}
Note: you need to know the some information about your PHP distribution. You can get those information with the phpinfo() function of PHP.
| PHP Version | 7.2.9 |
| Architecture | x86 |
| Thread Safety | enabled |
| Compiler | MSVC15 (Visual C++ 2017) |
Above information will help you decide which architecture you need to download from all the following steps.
1. Installation of Imagick for XAMPP v3.2.2 in Windows 10
Go to downloads area of the website of Imagick. ImageMagick runs in almost every version for Windows. Now download the latest available version with X86 architecture. Because that's the architecture that XAMPP uses.
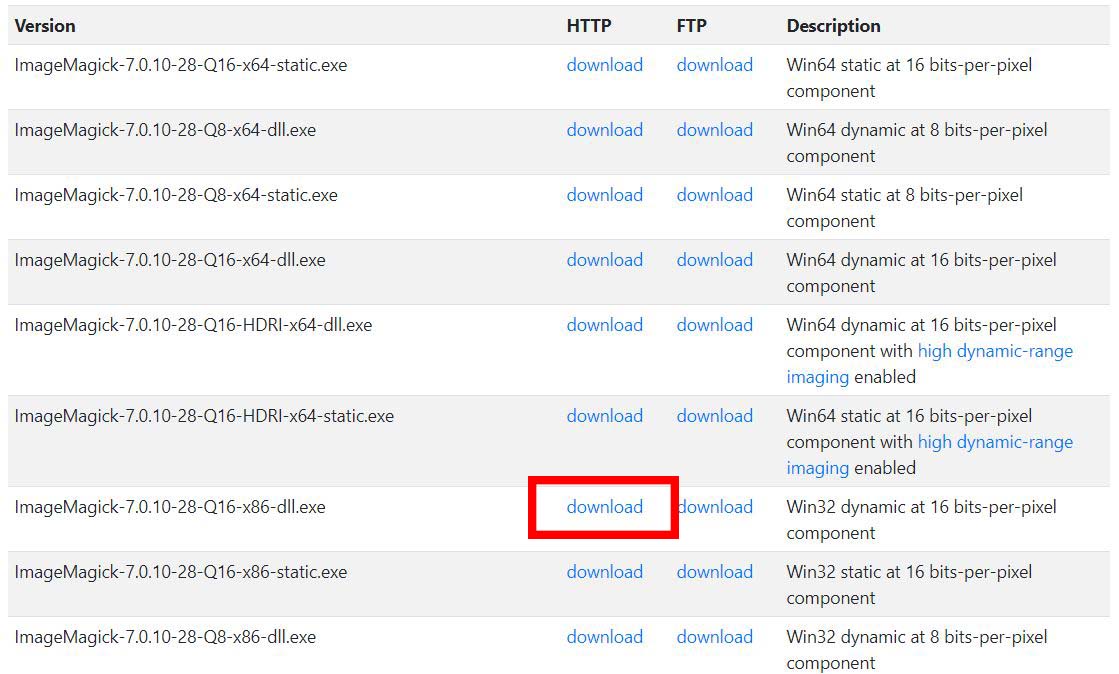
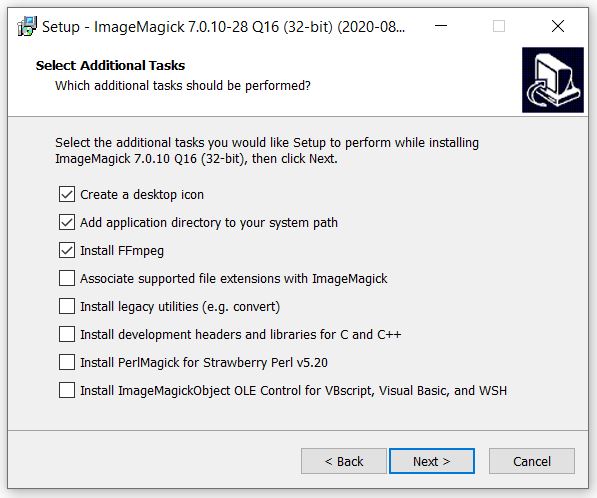
Download the executable and wait. Till the moment, we don't need to configure anything for PHP, just proceed with the installation of Imagick for Windows and don't forget to check the option to add Imagick to the PATH:
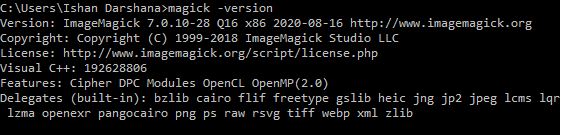
Once the setup finishes, you can test Imagick in a new command prompt executing (that should print the version in the console):
magick -version
2. Download Imagick for PHP
Navigate to the Imagick package in the PECL website and select the DLL version from the latest available version.
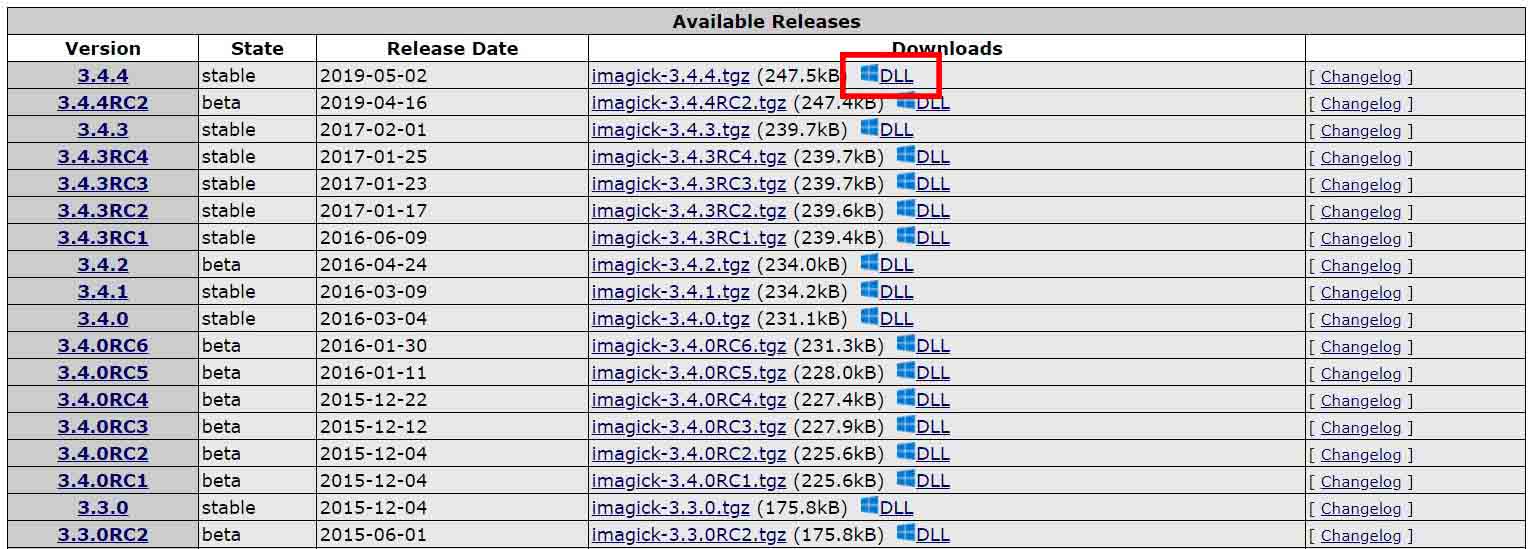
Then a new window will load, in this page scroll to DLL List and click on the right version for your PHP version with correct architecture (of XAMPP not your operative system) and the Thread Safe in case that it's enabled in your distribution (Refer to phpinfo to know wheter your php distribution uses Thread Safe or not):
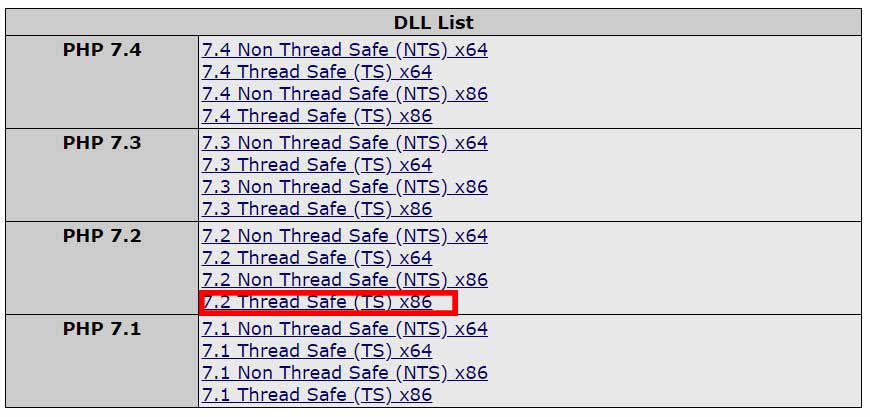
This will start the download of a zip file as,
"php_imagick-<version>-<thread-safe-or-not>-<php-compiled-version>-<architecture>.zip"
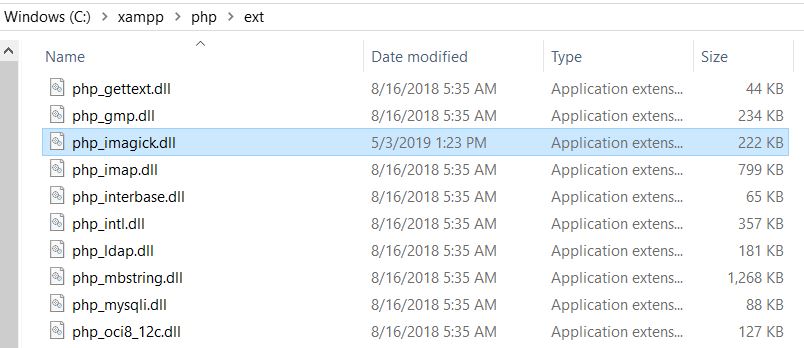
From this .zip you will need to extract only the php_imagick.dll file. Copy php_imagick.dll file and paste in the php/ext folder inside your xampp installation path (tipically C:\xampp\php\ext)
Then, open your php.ini (tipically C:\xampp\php\php.ini) file by adding the following line where the other extensions are loaded.
extension=extension=imagick
Now the extension is loaded, but Imagick still won't work as it won't even be recognized as an extension if you check the phpinfo file because we need to load all the methods and the binaries that you can retrieve from the next step.
3. Download required Imagick binaries
Yes! Three different downloads.I know what you're thinking now! The problem with Imagick is that there are a lot of builds from different sources and if you don't download and install the right ones, it won't work.
That's why you need to follow the steps as mentioned, otherwise you won't make Imagick to work. To prevent any implementation error, the binaries needs to come from the same source, in this case windows.php.net. To download the required binaries, navigate to PECL Deps here and search in the list for Imagick:
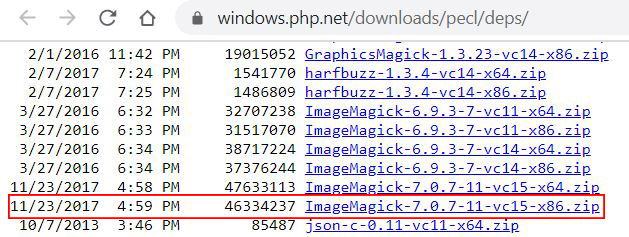
Download the version that matches with the architecture of xampp and check the compiler version. (ImageMagick-7.0.7-11-vc15-x86.zip). Now, extract all the files of this zip in a folder wherever you want.
Once the content of the file is extracted, open the bin folder and copy all the .dll files (except ImageMagickObject.dll) that would be about 146 files (with prefixes CORE_* and IM_MOD_*) and then paste the copied files into the apache/bin folder of xampp (tipically C:/xampp/apache/bin).
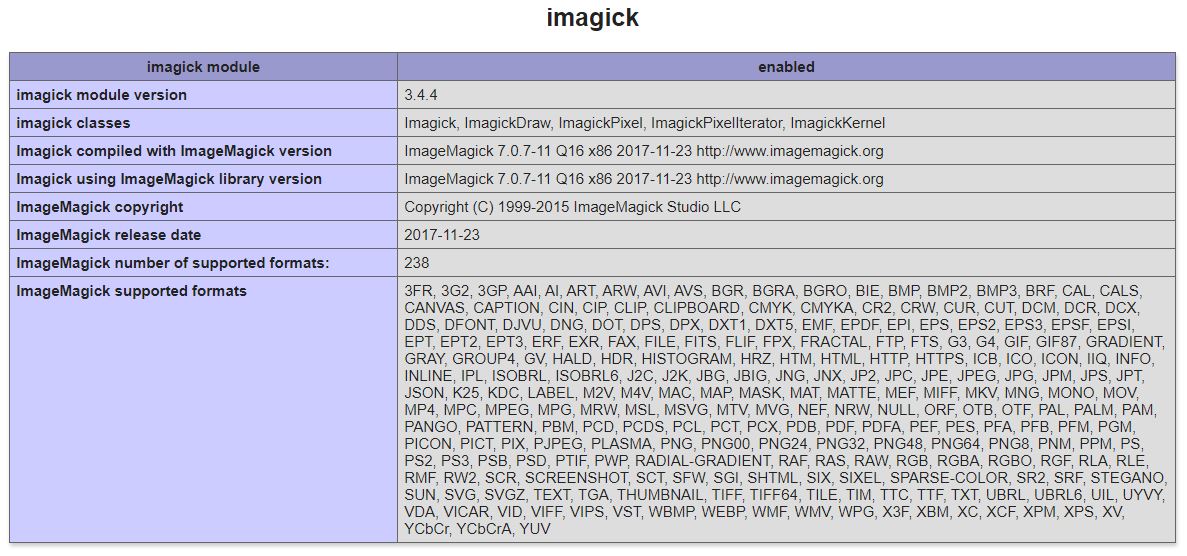
Now restart the apache server and go to phpinfo again. Now you should see imagick loaded as an extension
4. Resize image using Imagick::adaptiveResizeImage() function
This function is used to resize the image according to web sites. You can see full documentation here.
Example 1
<?php
$image = realpath("example.jpg");
$imagick = new Imagick($image);
$imagick->adaptiveResizeImage(200, 200, true);
//Writes an image to the specified filename
$imagick->writeImage($image);
Example 2
<?php
$image = realpath("example.jpg");
$imagick = new Imagick($image);
$imagick->adaptiveResizeImage(200, 200, true);

header("Content-Type: " . $imagick->getImageFormat() . "");
//Returns the image sequence as a blob
echo $imagick->getImageBlob();
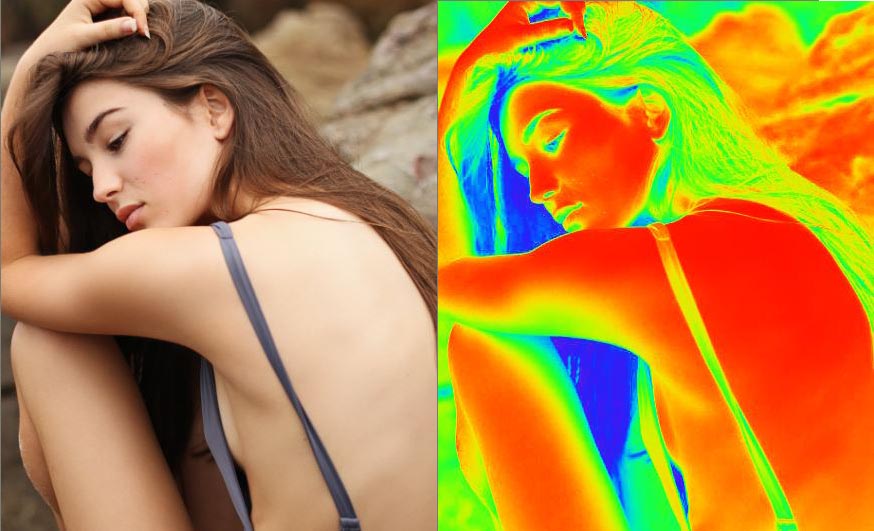
5. Use Imagick command-line utilities to generate heatmap/thermal effect
<?php
/*
  # THERMOGRAPHY
  # ------------------------------------------------------------------------------
  # Creates a violet to red rainbow gradient look up table image
  # Optionally crops and stretches it according to the lowpt and highpt values
  # Applies the rainbow lut to a grayscale version of the image
 */
#You must include correct ImageMagick path here
putenv('PATH=C:\Program Files (x86)\ImageMagick-7.0.10-Q16');
$image_input = realpath("example.jpg");
$im = "magick convert";
$grayscale = "grayscale.jpg";
$heat_map = "heatmap.jpg";


$color1 = "#8A2BE2"; #blueviolet
$color2 = "#0000FF"; #blue
$color3 = "#00FFFF"; #cyan
$color4 = "#00FF00"; #green1
$color5 = "#FFFF00"; #yellow
$color6 = "#FFA500"; #orange
$color7 = "#FF0000"; #red

if (!file_exists($grayscale)) {
#Create 100x100 solid black image called 'grayscale.jpg' as a placeholder
    create_solid_image($grayscale);
}
if (!file_exists($heat_map)) {
#Create 100x100 solid black image called 'heatmap.jpg' as a placeholder
    create_solid_image($heat_map);
}

#Hight point value on color table; float; 0<=integer<=100;[default=100]
$highpt = 100;
#Low point value on color table; float; 0<=integer<=100;[default=0]
$lowpt = 0;

$im_command = "$im -quiet -regard-warnings $image_input -set colorspace RGB -colorspace gray +repage " . realpath($grayscale) . "";
system($im_command);

$im_command = "$im xc: -format '%[fx:round(1000*($highpt-$lowpt)/100)]' info:";
$range_string = exec($im_command);
$range = str_replace("'", "", $range_string);

$im_command = "$im xc: -format '%[fx:round(1000*$lowpt/100)]' info:";
$offset_string = exec($im_command);
$offset = str_replace("'", "", $offset_string);

$colors = "xc:$color1 xc:$color2 xc:$color3 xc:$color4 xc:$color5 xc:$color6 xc:$color7";
$im_command = "$im $grayscale ( -size 1x1 $colors +append -filter Cubic -resize 1000x1! -crop " . $range . "x" . $range . "+" . $offset . "+0 +repage -resize 1000x1! ) -clut " . realpath($heat_map) . "";
system($im_command);

function create_solid_image($path) {
    $image = new Imagick();
    $image->newImage(100, 100, new ImagickPixel('black'));
    $image->setImageFormat("jpg");
    file_put_contents($path, $image);
}
Reference links,
- How to install and enable the Imagick extension in XAMPP for Windows
- Simulates a picture taken with a thermal imaging camera